Smart. Simple. Just what real estate needs right now
✅ Smarter tools ✅ Clearer maintenance records ✅ Unique, searchable property identity

"Old-School Hassle vs. Digital Ease—Why shuffle through papers when you can have everything at your fingertips?"
Try RealEasyHub Today
Traditional Realtor (Mark) & Client (Lisa)
Mark: flipping through a thick folder of printed listings
"Alright, Lisa, I’ve got a great property to show you! It’s a three-bedroom, two-bath home with a large backyard. I printed out some photos for you—here, take a look. The kitchen was renovated recently, and the neighborhood is fantastic. Oh, hold on—let me find the square footage… shuffles papers … Okay, here it is, 1,850 square feet. Oh, wait—I might have a better photo of the backyard on my phone. Let me scroll through… Just a sec… Ah, here it is! But you’ll have to zoom in to see the patio properly.”
Lisa: squinting at the papers
“Hmm… do you have any videos of the layout? It’s hard to get a feel for it from just pictures.”
Mark: "I don’t have a video, but I can drive over later and take a quick one for you! Also, I think I wrote down the property taxes somewhere… Let me check my notes.” fumbles through a notepad
Lisa: sighs “So everything’s kind of scattered? I just wish there was one place where I could see all of this without needing to dig through emails and papers.”
RealEasyHub Realtor (Brooke) & Client (Jordan)
Brooke: pulls out a tablet and smiles
“Jordan, I’ve got the perfect property for you! All you have to do is go to RealEasyHub.com, click on the top menu, right side, and just enter the name of the property—‘Willow Creek Estate.’ Everything is right there for you.”
Jordan: typing on phone “That’s it? Oh wow, here it is—photos, videos, even a detailed property log!”
Brooke: "Exactly! You can see maintenance records, recent upgrades, and even estimated property taxes—all in one place. There’s even a virtual tour so you can walk through the house from your phone."
Jordan: scrolling “This is incredible. And it’s so easy to share! I can just send the link to my partner instead of forwarding a bunch of pictures separately.”
Brooke: nodding “That’s the idea! Plus, if you want to keep an eye on it, you can ‘follow’ the property for any updates, like price changes or new listings in the area.”
Jordan: grinning “This just saved me so much time. Why doesn’t everyone do this?”
Brooke: laughs “Good question! But now you know the secret—RealEasyHub makes finding and managing properties effortless.”
Which homeowner or realtor do you want to be?
Be Ready. Stay Ahead.
Every property is for sale—it’s just a matter of when.
Success in real estate isn’t just about finding the right buyer or renter—it’s about being prepared before the opportunity arises. Whether you own, manage, or sell properties, staying organized and showcasing your listings can make all the difference.
Try RealEasyHub TodayOpportunities come when you least expect them. Will you be ready?
💬 What People Are Saying
"RealEasyHub Makes Property Management Effortless"
— C. Esposito, Property Owner & Manager
🏠 Why Name Your Property?
✅ Creates an Identity – Makes your property stand out
✅ Boosts Marketability – More attractive in listings & promotions
✅ Builds Emotional Connection – Buyers resonate with a NAME
✅ Adds Prestige & Value – Feels exclusive and premium
✅ Sparks Curiosity – Makes people want to learn more
📝 Why Keep a Property Log?
✅ Tracks Maintenance & Repairs – Avoid costly fixes
✅ Increases Value – Buyers & investors love transparency
✅ Aids Legal & Tax Purposes – Essential for insurance
✅ Documents Upgrades – Showcases improvements
✅ Simplifies Property Management – Perfect for all properties
The Power of a Building’s Name
Most Recognized Named Buildings in the World
Eiffel Tower (France) – A global symbol of France and romance.
Burj Khalifa (UAE) – The world’s tallest skyscraper, a marvel of modern engineering.
Empire State Building (USA) – A historic icon of New York’s skyline.
Big Ben (Elizabeth Tower) (UK) – A global timekeeping and architectural symbol.
Taj Mahal (India) – A world-famous symbol of love and architectural beauty.
Sydney Opera House (Australia) – An iconic landmark with a unique sail-like design.
Colosseum (Italy) – A legendary Roman amphitheater, a testament to ancient architecture.
The White House (USA) – A globally recognized seat of political power.
The Louvre (France) – The world’s most famous museum, home to the Mona Lisa.
Make Your Property Stand Out!
Property naming is now a key way to stand out.
A great name speaks to what your property is—and who it’s for.
A well-chosen name adds real value.
Try RealEasyHub TodayYour Profile User Guide

-
Login:
- Access the website and log in using your username and password.
-
Profile Access:
- Once logged in, navigate to your profile. This can often be done by clicking on your username or avatar in the navigation bar.
-
Profile Overview:
- View an overview of your profile, including basic information such as name, username, email, avatar, and other details.
-
Tabs and Sections:
- Profile Canvas Tabs - Explore different tabs or sections of your profile, such as:
- Activity - a feed from all yours and your Connection's activity
- Details - your personal details
- Property - your property details
- Gallery - images and videos
- Property Log - keep track of all property repairs, maintenance and special activities if you choose
- Log Media - images and videos for Property Log
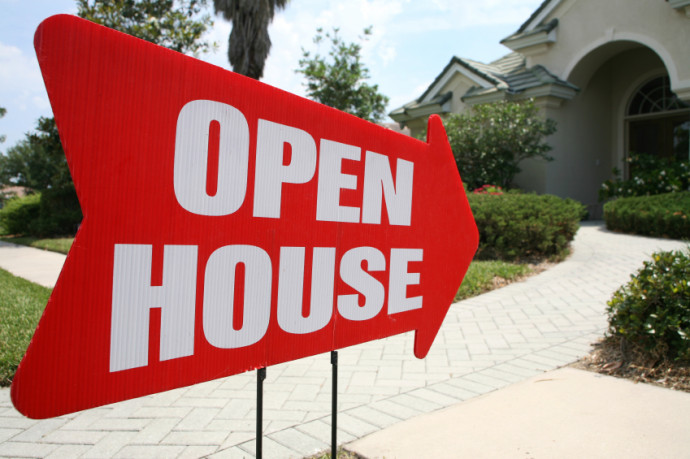
- Open House - list details of any Open House you may be having. This Tab is Searchable in Full Search Mode. This Tab will only appear on other Members profile only if data entered.
- Auction Sale - list details of any Auction Sale you may be having. This Tab is Searchable in Full Search Mode. This Tab will only appear on other Members profile only if data entered.
- Left Side Tabs - Communicate
- Quick Message - send a private message to Member
- Account - your account name
- Contact - your contact information
- Right Side Tabs - Collaborate
- Connections - your connections with RealEasyHub members
- Discussions - your's or Members Discussion Topics
- Groups - your Groups you are member of. Groups can be Open, Group members, Invite, Private
- Profile Canvas Tabs - Explore different tabs or sections of your profile, such as:
-
Edit Profile:
- Eddit your profile by clicking on the "Edit" button, top left above your profile canvas picture. This will open a form where you can update your personal information, settings, and preferences.
-
Upload Media:
- RealEasyHub has media features, you may be able to upload photos, videos, music, or files to your profile. Create albums if necessary.
-
View Media:
- Click on thumbnails or icons to view your uploaded media. A pop-up window will appear to display the full image, video, or other content.
-
Change Avatar or Canvas:
- Customization options are available, change your avatar or canvas by clicking on the "Edit" button in the Portrait or Canvas tab.
-
Change Settings:
- Update your password, language, editor, or other settings by navigating to the "Account Info" tab and clicking on "Edit."
-
Logout:
- To log out, click on the "Logout" button usually located in the top right corner of the website.
-
Help and Support:
- If you need assistance, in the top menu click "Help" or for "Support" we have a community discussion for user discussions. Click Disscusion in the Top Menu.
Enjoy
Article compliments of:
RealEasyHub Forum User Guide
Introduction - Real Estate Social Profile Discussions
RealEasyForum is a popular forum that allows you to create and manage online discussions. By using your Forum , you can enhance the functionality and your user experience of your forum and your community.
Displaying and Editing the Kunena Profile Tab in CB
You can display and edit the Forum profile tab in the CB profile page. To do so, follow these steps:
- Go to the your profile page. You can access it from the main menu or from the RealEasyHub forum.
- Click on the Forum tab. You will see the Forum profile information and settings of the user, such as the username, rank, posts, karma, thank you, subscriptions, favorites, etc.
- If you are viewing your own profile or you have the permission to edit the profile of the user, you can also edit the Forum profile information and settings of the user. To do so, click on the Edit button and you will see a form where you can change the username, rank, karma, thank you, subscriptions, favorites, etc. Click on the Save button to apply the changes to the Forum profile.
Displaying and Editing the CB Profile Tab in RealEasyHub Forum
You can display and edit the CB profile tab in the Forum profile page. To do so, follow these steps:
- Go to theForum profile page of any user. You can access it from the forum or from the CB profile page.
- Click on the Community Builder tab. You will see the CB profile information and fields of the user, such as the name, email, avatar, online status, signature, location, gender, website, personal text, social icons, etc.
- If you are viewing your own profile or you have the permission to edit the profile of the user, you can also edit the CB profile information and fields of the user. To do so, click on the Edit button and you will see a form where you can change the name, email, avatar, online status, signature, location, gender, website, personal text, social icons, etc. Click on the Save button to apply the changes to the CB profile.
Using the Forum Discuss to Show Forum Topics in
The Forum Discuss allows you to show the forum topics. You can also create new topics or reply to existing topics from the article page.
Article compliments of:
RealEasyHub Groups User Guide
Groups can have their own categories, forums, events, media, files, and more. You can also integrate groups with other extensions such as Kunena, CB Activity, CB Gallery, etc.
Introduction - Real Estate Social Profile Connections
This user guide will help you to set up and use CB Groupjive profiles on your website. You will learn how to:
- Create and join groups
- Manage group settings and permissions
- Customize group appearance and layout
- Interact with group members and content
You can create some categories and groups to start with. Go to Categories or Groups tabs and click on the New button. Fill in the details and save the category or group.
Creating and Joining Groups
You can start creating and joining groups on your website. To create a group, follow these steps:
- Go to your CB profile page and click on the Groups tab.
- Click on the Create Group button. You will see a form where you can enter the details of your group.
- Choose a category for your group from the drop-down menu. You can only choose from the categories that are enabled and allowed by the administrator.
- Enter a name and a description for your group. You can also upload a logo and a cover image for your group.
- Choose the type of your group from the following options:
- Open: Anyone can join your group without approval.
- Approval: Users need to request to join your group and you need to approve them.
- Invite: Users can only join your group if you invite them.
- Closed: No one can join your group. Only you and the users you invite can see the group.
- Choose the access level of your group from the following options:
- Public: Anyone can see your group and its content.
- Registered: Only registered users can see your group and its content.
- Private: Only group members can see your group and its content.
- Optionally, you can enable or disable the following features for your group:
- Forum: Allows you to create a forum for your group using Kunena or another forum extension.
- Events: Allows you to create and manage events for your group using CB Events or another events extension.
- Media: Allows you to upload and share media files for your group using CB Gallery or another media extension.
- Files: Allows you to upload and share files for your group using CB Files or another files extension.
- Click on the Save button to create your group.
To join a group, follow these steps:
- Go to the Groups page on your website. You can access it from the main menu or from your CB profile page.
- Browse the available groups by category, name, type, or access level. You can also use the search box to find a specific group.
- Click on the name of the group you want to join. You will see the group details and the join button.
- Depending on the type of the group, you can join the group by clicking on the Join Group button, requesting to join the group by clicking on the Request to Join button, or accepting an invitation to join the group by clicking on the Accept Invitation button.
- Once you join a group, you will become a member of the group and you will be able to see and interact with the group content and members.
Managing Group Settings and Permissions
As a group owner or moderator, you can manage the settings and permissions of your group. To do so, follow these steps:
- Go to your group page and click on the Settings button. You will see a form where you can edit the details of your group.
- You can change the category, name, description, logo, cover image, type, access level, and features of your group. You can also delete your group by clicking on the Delete Group button.
- Click on the Save button to apply the changes to your group.
To manage the permissions of your group members, follow these steps:
- Go to your group page and click on the Members button. You will see a list of your group members and their roles.
- You can change the role of a group member by clicking on the Change Role button. You can assign the following roles to a group member:
- Owner: The owner of the group. Can manage the group settings and permissions, invite and approve users, and create and moderate content.
- Moderator: A moderator of the group. Can invite and approve users, and create and moderate content.
- Member: A member of the group. Can create and interact with content.
- Banned: A banned user of the group. Cannot see or access the group.
- You can also remove a group member by clicking on the Remove Member button. This will delete the user from the group and revoke their access to the group content.
Interacting with Group Members and Content
As a group member, you can interact with other group members and the group content. To do so, follow these steps:
- To view the group members, go to your group page and click on the Members button. You will see a list of your group members and their roles. You can also use the search box to find a specific member. You can click on the name of a member to view their CB profile page.
- To send a message to a group member, go to their CB profile page and click on the Message button. You will see a form where you can enter and send your message. You can also view and reply to the messages you have received from other group members by clicking on the Messages button on your CB profile page.
- To view the group content, go to your group page and click on the Content button. You will see a list of the content types that are enabled for your group such as forum, events, media, files, etc. You can also use the search box to find a specific content. You can click on the name of a content to view its details and comments.
- To create a new content for your group, go to your group page and click on the Create Content button. You will see a form where you can enter the details of your content such as title, description, category, date, file, etc. You can also upload and attach media files to your content using the media button. Click on the Save button to create your content.
- To edit or delete your content, go to your content page and click on the Edit Content or Delete Content button. You will see a form where you can edit or delete your content. Click on the Save or Delete button to apply the changes to your content.
- To comment on a content, go to the content page and scroll down to the comment section. You will see a form where you can enter and submit your comment. You can also view and reply to the comments from other group members. You can also edit or delete your comment by clicking on the Edit Comment or Delete Comment button.
Article compliments of:


